Results 1 to 30 of 93

Thread: XRAYSPECS - 2002 - BE - L - Upgrade Everything

Hybrid View

Previous Post Previous Post   Next Post Next Post
  1. #1
    "FNG"
    Join Date
    Dec 2019
    Location
    Riverside
    Posts
    82
    Points
    1
    Level
    1
    Points: 1, Level: 1
    Level completed: 0%, Points required for next Level: 1
    Sub-frame is out, so many crusty bushings, got all of the links loose and time to start putting the new urethane ones in. lots of PB blaster and cheater bars to get bolts and nuts that havent moved in almost 20 years loose. time to start planing adding shop air to my garage.


    Finished stripping the rear sub-frame of the links and hubs. My plan is to put new bushings in the sub-frame, then put the sub-frame back in, then add the diff back and build the suspension back into the car as i get the bushings into all the links. I really should upgrade the sway bar and shocks/springs.


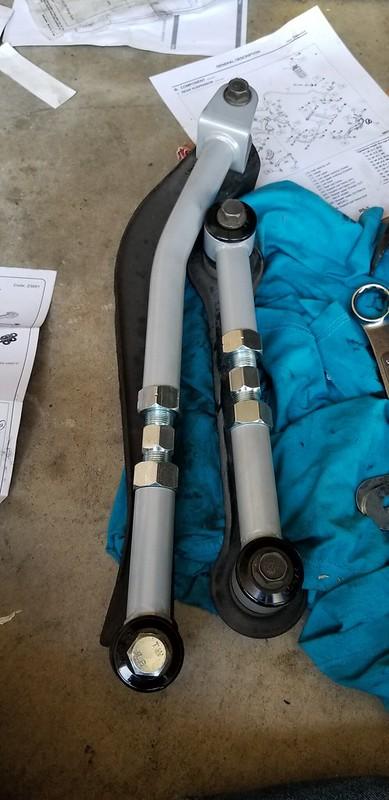
    since I plan on installing the whiteline adjustable control arms, I am putting on the toe lock bolts in.

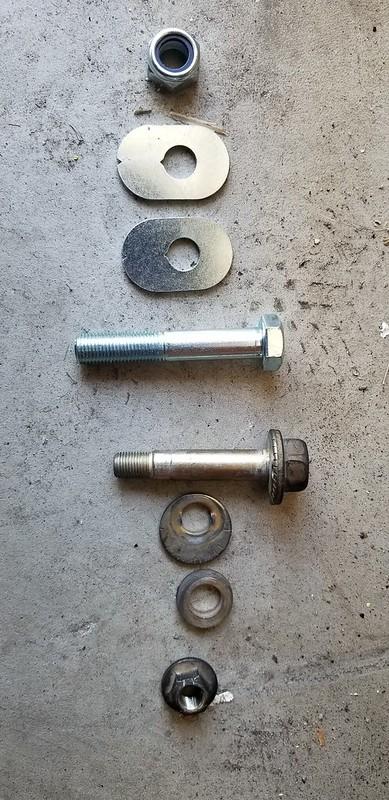
    Original OEM adjusters.


    The lock kit next to the oem eccentric bolt adjusters


    Temporally installed in the sub-frame till the arms go in.


    I haven't got a press in my home garage yet and my work shop is full up with work so cant exactly sneak a subframe in to press bushing in and out right now without getting in trouble. Resorted to how i've done it before in the past.

    started with the diff bushings as they were already 90% ripped.

    Start with cutting out all of the guts of the rubber you can out of the bushing.


    then you need to use a metal blade or high TPI bald for the next step. put the saw into the bushing and start cutting, you want to cut through the metal of only the bushing. you want to make 3~4 notches all on the same side about 1/2" from each other. use a chisel/punch and hammer to peal the bushing back where the notches are located at. take care not to gall the face on the subframe when doing this.


    the bushing should look like this once you start to get it pealed back, just keep beating it with a punch till it pops out.


    when done right, shouldnt take anymore time than using a press and the proper jigs.


    for my next trick press the bushings in with no press... but need to knock the rest of the subframe bushing out.

    Been busy with work lately, however managed to get some more of the diff bushings out.


    installed KTD905 Into the outrigger. Almost done cutting and chipping the stubborn subframe bushings all out so I can put the polymer ones in.


    Subframe Bushings out, after almost 20 years they really really really really didnt want to come out of the subframe without a fight. I have zero body rust, but the subrframe bushings had some on the bushing that was really keeping them in. They all pretty much look like this one once they came out.


    sub-frame all ready for the new Powerflex poly bushings.


    Bushings fit perfectly. cant wait to see how they transform the car along with all the other bushings.


    Rear most bushing on the trailing arms is out and working on getting the bushings out of the upper links.


  2. #2
    "FNG"
    Join Date
    Dec 2019
    Location
    Riverside
    Posts
    82
    Points
    1
    Level
    1
    Points: 1, Level: 1
    Level completed: 0%, Points required for next Level: 1
    once the subframe was in and settled i toured to spec, will be checking it again after a couple hundred miles for any settling.

    upper arms have all new bushings and are in.


    remove the little trim piece, two 12mm fasteners to get access to the bolt to stick a torque wrench on it.


    Set the adjustable arms to match the OEM track and toe arm lengths to start with. gets it close to the ballpark to start for when you go in for an alignment. i used the oem arms and bolts to make sure they matched up before snugging the arms up for installation.


    everything installed and torqued to spec, waiting on the trailing arms and hubs.


    driver side trailing arm and hub install.


    install should be done this weekend if the heat wave doesnt get to bad.

    all new shinny rear subframe and trailing arm bits are installed and torqued to spec. she looks good, cant wait to get it on the ground and aligned.

    only thing left to do is put the brakes back on, and bleed the brakes.

    after than itll be on to the install the JDM front clip.


    Finally got the old girl back on the ground.

    still need to bleed the brakes a few more times to get all the air out of the lines and take her in for an alignment but shes off the jackstands! after the alignment its time for some new tires.


    - - - Updated - - -

    Adjusted the park brakes and bleed the brakes, and put the new in transmission mount into the car last weekend and got it on the ground, took it around the block everything felt good, and went to park and the park brake cable on the passengers side broke. im going to replace both the drives side and passenger side here when the parts get in. Ordered one of each p/n's 26051AE06A & 26051AE07A. Ill add pictures when they get in.

    But since now I have all the mechanical parts fixed up and repaired it was time to swap the front clip.


    Stripped of the USDM Legacy L front clip and waiting on the JDM Spice I got a while back.


    test fit of the bumper and lights, still need to sort out all the wiring to have the correct connectors for the fogs and the hids.


    Some more work today since its finally cooling back off.

    Got the core support separated from the cut off, the headlight supports should be larger that the ones on my chassis and allow the headlights and ballasts to fit with no needing to hammer it open.


    also test fit the fenders, i knew the jdm trim line wouldn't match the usdm from research I had done in sli.net, but i think i have a plan for what I'm going to do with them. if it works ill post it if not ill find a passenger side usdm fender to replace the trashed one on that side.


Posting Permissions

  • You may not post new threads
  • You may not post replies
  • You may not post attachments
  • You may not edit your posts
  •